Friday, August 31, 2012

Pinspiration Friday: Fabric Flowers

Fabric Flower Tutorials are every where.  
A search on Pinterest or Google will yield a hoard of results.  
However, I've done the dirty work for you.  

Below are my three favorite tutorials.  
They are full of pictures and easy to follow directions.  
Just click on the picture to be taken to the site!


Tuesday, August 28, 2012

Sticker Organizer


Much like my scrapbook paper organization, it took me a while to figure out what worked for me to store and easily access my stickers.

If we're all honest with ourselves, we know accordion files were really created for crafters.  There are so many storage uses for them, they can't possibly have been meant for the office!  For my stickers, I purchased this accordion file on super clearance at Staples.  I believe it was only $3.

I bedazzled the front with these gorgeous stickers from Michael's.  I'm obsessed with them!  So shiny!

I printed on clear labels to keep my tabs clean and uniform. 

My labels are:
Alphabet
Spring
Summer
Fall
Winter
Disney
Travel
Nature
Sports
Food & Bev
Shapes
Misc.


Just stuff the stickers in and ta-da!  Easy access!
I use my sticker organizer pretty frequently and I love it!

What are your sticker organization solutions?

Monday, August 27, 2012

Mondays with Martha: Fall Organizing Tips

Summer is coming to an end and fall is creeping in.  Fall is a great time to get your home in order before guests start visiting for the holidays.  Here are some of my favorite quick organizing tips from the Martha Stewart website.  For more tips, please see this slideshow.

 Remote Control Holder
Yes, we all wish we could have universal remotes
that don't take a personal IT professional to program.
Use a ceramic pot or other decorative holder to gather 
your numerous remotes.
 
 Slipper Basket
Having a basket full of spare slippers 
is a welcoming surprise for any house guest.
This is an excellent option for homes that 
have a "no shoes" rule.
Give your guests an alternative.
 
 Garden Caddy
Next time you're in a home improvement store,
grab an inexpensive tool belt.
Load the belt with fall gardening tools
and tie to your wheel barrel for easy access.
 
Garage Storage
Don't have a tool shed? 
Use standard screws and bungees
to create holders in your garage walls.
 
 What are some of your favorite fall storage tips?

Friday, August 24, 2012

Preppy Projects Week Recap

Thank you all so much for joining me for 
Preppy Projects Week!

I hope you found some classy inspiration and are busy creating your own projects.

If you do make anything inspired by my blog, I'd love to see it.
Email me a picture at thecreativecubby@gmail.com!

In case you missed any of the projects, here they are!
Click on the pictures to instantly access.


Thank you again!

Preppy Projects Week: Ruffle Tie Necklace


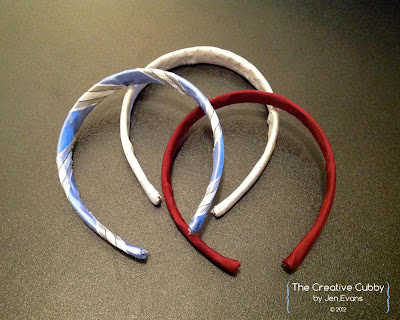
 Our final preppy project is a modern interpretation of a necktie...
for the ladies.

This ruffle tie necklace takes a mere 10-15 minutes to make 
and produces adorable results!
Materials
Tie
Seam Ripper
Scissors (or Rotary Cutter)
Necklace Chain
Sewing Machine
Super Glue or Fabric Glue
Tape
Wood Skewer

Instructions
1.   First, begin by deconstructing your necktie.  Sorry, Tommy, this necktie needed to be sacrificed.

 2.  Iron out your fabric.

 3.  Measure and cut your fabric.  You will measure 20" x 3". 

4.  Seal the edges of your material using a lighter or glue.  If you choose to use a lighter, please use a long-necked one.  Use extreme caution and perform at your own risk.  The Creative Cubby is not responsible for you burning your fingers, your fabric or your house.  
To do this properly, hold flame about 1/4" away from the end of the fabric.  I suggest practicing on a scrap before going for your main piece.  You will notice the edges will begin to melt (look a little plastic-y) and seal the threads together.  Some browning may occur but this can be minimized by holding the flame at a greater distance from the edge.

 5.  Once your piece is sealed to your liking, fold in half longways and pin together the entire length.  I will be using a 1/4" seam allowance and sewing on the fold side.  Therefore, I put my pins right down the middle of my folded strip.  If you're using a larger/chunkier chain, you will need to pin further to the left/open side (non-fold side).

 6.  Time to run it through your sewing machine.  You will sew on the fold side.  I repeat - you will sew on the FOLD side.  Also, do not reverse stitch.  You will start and end your seam with a straight stitch.  Again, do not reverse stitch.  Be sure to have a lengthy tail before you start sewing.  You will need the extra thread.
I used the right edge of my sewing foot to guide my distance from the edge, which was about 1/4".  You will want to sew further to the left (non-fold side) if your chain is larger/chunkier. 
Cut from the machine with a long tail.  

**You will notice I used navy thread on the front and white on the back.  Typically, you would use matching thread for top and bottom.  I did this so the following steps would be easier to follow.  If you are new to sewing, this may be a good technique to distinguish front and back on this project as you won't see the white thread when you're done.

 7.  Grab your wood skewer.  Hold fabric front side up.  You have this awesome little gap at the top of your fabric from sewing your seam.  Push the skewer through (flat side first) the fabric tunnel.  Hold the entire length of fabric on the skewer.

 8.  Grab a piece of tape and adhere the loop end (not hook) of your chain to the flat tip of your skewer.  Simply hold the chain parallel against the skewer and wrap the tape all the way around to hold into place.  Then, pull your chain back through the fabric tunnel.  Be careful to keep all the fabric on the chain - do not let your end slip into the fabric tunnel!  You will have to start over!  Once your fabric is safely off the skewer and on the chain, hook the ends together.

 9.  Holding your fabric in one hand toward the right end, hold (firm but gentle) on the white thread.  This will allow you to slide the fabric along the thread causing it to ruffle.  Work from the outside in.  You will notice that you can only ruffle/pull so far before the fabric starts resisting.  This is when you move your hand further down (left) the fabric and start pulling from there - moving all the ruffles toward the center.  Once you reach the center, move your hands to the left side and work from the outside in. 
 You should have a beautiful full ruffle in the middle.

 10.  Finally, tie your ends using simple knots and glue the ends into place.  This will ensure your ruffles stay intact.  

And you're done!  
This necklace can be done with a number of fabrics
but I hope you enjoy your preppy modern lady necktie!


Thursday, August 23, 2012

Preppy Projects Week: Tie Tote


Sometimes a girl just needs a preppy tote.
A tie tote is not only a cool project with ties,
it's a great way to show your school pride!
I found ties that correspond with my beloved
Arizona State University!
Maroon and Gold!
Again I found ties at Goodwill
and for this project you'll use the entire tie.
No waste!

Materials
Canvas Tote
Ties (I used 8)
Scissors
Seam Ripper
Sewing Machine
Needle
Embroidery Floss in complementary color
Measuring Tape

Instructions
1.  I used a simple white tote I had lying around my craft room.  These are typically sold in packs of three at craft stores.  Measure your tote's width and length.

2.  Measure and cut your ties. You will need the wide end of the tie and the skinny tail for this project.

3.  Deconstruct all your ties.  For detailed instructions on deconstructing, please see the Tie Pillow Tutorial.

4.  Figure out your pattern.  I focused on every other piece being skinny and wide, as well as the maroon and gold being evenly spaced.

5.  Pin your tie flaps together in such a manner that your pressed seams (from the original tie structure) will be sewn together. 

6.  Sew together along all the seams.  Be patient with this.  It took me forever because I am not a very skilled sewer - but practice makes perfect!  When you're done, you will have a tie fabric!

7.  Lay out your fabric face up and fold in half length wise.  We are going to sew two seams along the outside to create a pouch.  Pin your fabric together.  Be sure to measure multiple times.  You will want to be sure that your tote will fit in your little pouch. {The picture below makes it look crooked... I swear it wasn't - bad photographer moment}

8. Sew up your sides with two straight seams.  As always, please remember to reverse stitch your seams.  This will lock your thread into place.

9.  Turn your fabric right side out and stuff your tote inside.

10.  Fold your excess material so it is even with the top of the tote.  Pin into place. 

11.  Use a blanket stitch to finish off the top.  If you've never used a blanket stitch, have no fear!  It is super easy and looks lovely when done. 

Go all the way around the top edge of your tote and you're done!  
I would recommend adding some extra embellishments if you'd like!

Check back tomorrow for our last Preppy Project!

 
Blogging tips