


I have been so envious of this project for the past few months. I've seen tutorials and before/after photos floating around on the internet and kept thinking, "I'd love to do that!" Finally, my husband and I decided to go for it. We were thrilled with the results!
First... let's talk about some realistic expectations.
1. This project will not be finished in one weekend. It will take two weekends of your time. While this is primarily drying time, don't expect to have your bathroom back in a few days.
2. The costs do add up for this project. Expecting that you don't have any of the materials, you will be spending about $75.00.
3. You will need to order materials online. The gel stain and polyacrylic I purchased are usually not available locally. I purchased them for $30.00 (total) on Amazon.com {see link below}. I do not recommend substituting these materials. Their results are uniquely amazing.
Alright, now that we have those important details out of the way, let me say...
Do not be afraid of this project. I cannot stress enough how easy it was to get these crazy great results. Just have a little patience.
Now for the fun stuff....
Materials
General Finishes Java Gel Stain (pint)
General Finishes Polyacrylic Top Coat (pint)
Vinyl Gloves {10 pack... only $1.50 at Home Depot}
Men's Socks {2 pairs}
Foam Brushes {2 is good, three is better}
Floor Covering
Painter's Tape
Screw Driver
Sander and/or Sand Sponge {This CAN be done without an electric sander!}
Microfiber Cloth
Painter's Pyramids {Optional}
Washcloths
Gel Stain
Polyacrylic

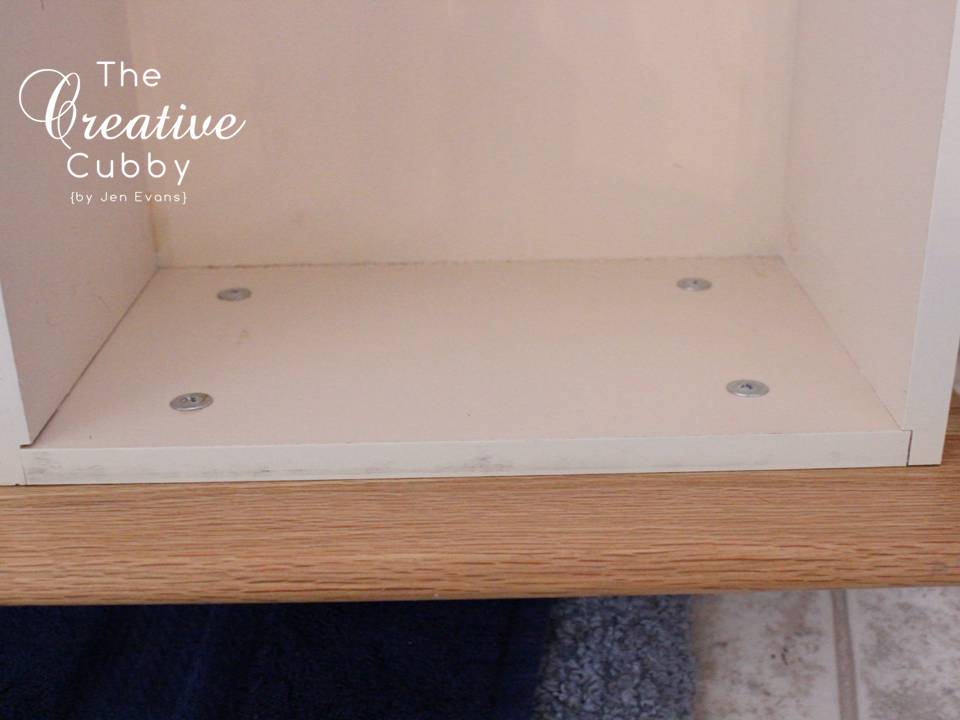
1. Empty out your entire vanity. Again, remember that you will be losing your bathroom for a little over a week, so make sure items are easily accessible.

2. Take a moment to really clean out your drawers, counter tops and floor around the cabinets. You will want to focus on eliminating any dust and hair in the area. Check out that awesome purple eye shadow I found in my makeup drawer. Sadly, it's from the previous owner... eeeewww.

3. Lay down your floor covering and tape off your area. You may chose to use craft paper. I chose to use leftover, heavy-duty wrapping paper. Take the time do this meticulously. It will pay off in the end.


4. If your design allows, remove drawer fronts. If it does not, use painter's tape to protect sides of drawers. I recommend doing two rows of tape. While staining, your fingers can go a little rouge and get stain everywhere. Better safe than sorry.


5. Remove doors from hinges.


6. Sand down all your surfaces. Again, this CAN be done without an electric sander - it will just take a little more time.
When sanding, don't go crazy. You just need to buff up the surface, not sand all the way through. Don't spend too much time on each piece, but don't forget the edges. Every single square inch needs to be sanded - the gel stain will not adhere if you don't.
Again, take the time to do it right. It will pay off in the end.


7. Wipe down all your sanded surfaces with a microfiber cloth. Remove ALL dust!

8. Time to gear up! Vinyl glove first, followed by a men's sock. Why a men's sock? They are longer and will therefore protect your arm and stay on! It's possible to use women's socks though. We don't discriminate.


9. Set up your doors on painter's pyramids if you so choose. This will allow you to do both sides at one time. We used them for the first round and then never again. It was just easier to have them on the ground, but it's entirely up to you.

10. Time to get going!!! So exciting!!! First things first, turn on the bathroom fan. These fumes will getcha!
Now here's the deal... it doesn't take much gel stain to make a high impact. When staining, just dip your sock in the stain. You only need a small dollop per drawer and about a tablespoon or so per side of a door.
The trick is even, thin coats. Avoid leaving clumps of gel anywhere. Gently rub with the grain, make it even and take a deep breath. It's not going to look like much at first, but it'll get there. I promise.


**You may consider setting up a small fan. It helps with drying as well as ventilation.
11. Apply Coat #2. Here's what our looked like afterwards.


12. Apply Coat #3. This is the time for serious touch-up. I used a foam brush to get into cracks and hard-to-reach places. Pay special attention to doors, along the edges of those fake drawer fronts and along the wall.

13. Finally, apply Coat #4. Last chance for touch- up. Is everything even? Do you have any gaps? Pay special attention to the edges of the doors and drawers. Ours had really deep grains and need a little extra love.

14. After 5 days, your gel stain will be really set. Do one final look over for touch-ups. Ready? Grab pair of socks #2, suit up and dig in. Apply the polyacrylic using the same method as the stain. You will notice you need much less to cover your pieces because it is water based. Apply a thin, even coat and avoid leaving any clumps. These are easily identified as the area will be cloudy instead of clear.


Wow! Check out those beauties!!!

Give it a shot and definitely let me know how it goes!


 ,
,

Nice job! Will be doing this tomorrow...reading different blogs to make sure I do it right!
ReplyDeleteThank you! Best of luck to you! We loved the results - hope you do too!
DeleteIf you have any questions, please feel free to contact me either here or by email!
Did you use synthetic steel wool between your top coats?
DeleteThey look wonderful. I'm in the process of doing this now, but the second coat has me freaked out! Did you wipe each coat as you went, or did you pull on an even coat and let it dry?
ReplyDeleteWith gel stain, it is okay to spread on thinly with a foam brush and NOT wipe away excess (just make sure you do not leave globs). This may increase your dry time between coats, but you will have to do fewer coats. And make sure to give it at least 5 days between the gel stain and the gel topcoat to make sure the stain has dried all the way through (although if you use the gel topcoat, it's much more forgiving than other sealers).
DeleteGlad you're giving it a shot! The separate coats can be a little...concerning but stick with it. Apply thin, even coats and let them dry completely before moving forward. This is the Ugly Duckling of DIY - after you get through the coats it will be beautiful.
ReplyDeleteLet me know if you have any further questions.
The third coat is looking pretty good, but some streaks. I don't mind them, but my husband thinks they should be gone, so I'll do a 4th coat and then put on the poly. They will look solid and like paint rather than a stain, I think, but this is a practice run for doing the kitchen raised panels only on my maple cabinets so I don't have all that yellowy color to look at. Anyone else who has done just parts of the cabinet?
DeleteJen,
ReplyDeleteHi! Just wondering the type of wood of your cabinets? I am redoing old oak cabinets and want a fresh new look, but I don't want the wood grain to show through. I read another blog that did paint on oak and it did not show the heavy wood grain. But I have worked with the gel stain in the past and really like the finished product. Let me know what you think.
Thanks! C
Hi C - Our cabinets were the builder's grade oak. After four coats of the gel stain, a little of the wood grain did show through. The grain was more visible as ridges than as color high/lows (or variations). In other words, the color was consistent across the cabinets, but you could see the ridges of the grain. Does that help?
DeleteWe did this in our kitchen and it looks great. Question... We have a few spills and since the top coat is water based... What do you use to clean spots and spills without taking off the clear coat or stain?
ReplyDeleteOh no! According to the company, it really depends on what was spilled. To be safe, wipe down with a damp cloth and a mild cleaning agent. Avoid products that are alcohol or ammonia based or contain silicon oils.
DeleteHopefully that helps - let me know how it goes!
Jen
We used this process in our bathroom and although the cabinets turned out beautifully, we are having issues with chipping. Have you had any issues with chipping? I just finished the last coat of gel stain on my kitchen and I am in the waiting 5 days step. I am concerned about using the water based poly over the oil based gel. I am in CA so I can not buy the oil based poly. Any advice would be appreciated.
ReplyDeleteThanks,
Jannee
Hi Jannee - I'm so sorry you're having issues! I have not experienced any chipping and am I unsure what would cause it. What kind of chipping are you experiences? Is it on the edges or in the middle of the panels?
DeleteIn regards to the water-based poly, I used water-based on these cabinets and they have held up great! The key to working with the oil-based gel is to make sure it dries all the way through. Once you are SURE it's dry, the water-based polyacrylic will do its job beautifully.
Please let me know if you have any further questions!
Best of luck!
Jen
Jannee, you needed to use the wipe-on urethane topcoat called "General Finishes Gel Topcoat" on top of the gel stain. You may can sand off the polyacrylic to get rid of as much of the loose product as possible, apply another coat of gel stain, then follow with the gel topcoat. Generally, you do not apply any water-based products on top of oil-based (at least I've never seen a situation where that has held up to wear).
DeleteNope. Don't use the wipe-on urethane topcoat. It's not meant for projects like this with 4 coats of gel stain. I used it and it wiped off some of my stain and my cabinets uneven, I have to go over it again with the original gel stain. Use the water based poly and you will be fine. I called GF and confirmed this.
DeleteThe Polyacrylic that was used here is generally a brush-on product. The wipe-on sealer that you want to apply on top of the gel stain is General Finishes Gel Topcoat Wipe-On Urethane (only comes in satin finish).
ReplyDeleteI am just starting this project and was wondering how much sanding you did on the drawers and doors. I am not using an electric sander and I have sanded quite a bit but they still look the same as when I had started?
ReplyDeleteHello - You only need to do enough sanding to scuff up the surface. As long as you're breaking through the top coat a little bit, you're good to go! No need to work all the top coat off or change the color.
DeleteThis looks beautiful!! I think I want to try it in my kitchen. Quick question though, if I may... You appear to have light grey walls. How do these look against the grey in person? Are they very obviously dark brown? Or do they read as black? I'm tired of brown. :)
ReplyDeleteHi Leigh - We had "Cathedral Gray" by Behr paint on the walls. The cabinets do read as a dark brown - not black. General Finishes does offer a black stain, but it is a water based traditional stain (not gel). Hope that helps!
DeleteIt does, thank you so much for your reply! I emailed the company too, and they said universal tint can be added to the gel stains. Think I'll give that a whirl. Your after looks so great I probably won't mind too much even if I can't get it black. :)
DeleteHi Jen, this is by far the best tutorial out there on gel staining.. thank you very much :) I started staining my kitchen cabinets last week, and was getting nervous because I had to apply four coats and it was still a little streaky.. I guess I wasn't using enough stain with each application.. will try again.. thank you!
ReplyDeleteThank you so much for your kind words! Don't get discouraged - keep applying until you're happy but remember to let it dry in between. You'll get there! Hope it turns out beautifully!
DeleteHello! It looks great! I have a question: do you lightly sand in between coats? I think I read some where to do this. Thanks!
ReplyDeleteHello - No, I didn't sand in between coats. With the gel stain sanding between coats is not necessary.
DeleteNice.It was so helpful. I am on stage three of gel staining. The waiting is a killer. I talked to the guy at our wood refinishing store here at Boise, and he said you don't have to use the top coat if you don't want the shine. I'm lucky its sold locally I bought black to add to the Java because I wanted mine almost black.
ReplyDeleteDid you sand between coats of the polyacrylic topcoat? The can says to but I tried it on the back of one of the cabinet doors and it scuffed up the finish.
ReplyDeleteHello - No, I did not sand in between any coats of any of the material. I had heard that it doesn't give you the finish that most people desire on the cabinets. Hope this helps!
DeleteReally nice job dear, I am looking for some bathroom cabinets.
ReplyDeleteDIY Gel Stain Cabinets are really nice and strong more then others.
ReplyDeleteThis is an excellent tutorial, thank you. I am getting ready to do my kitchen and gathering final procedures and buying the products. Thought I could buy it at a local store but they don't carry the GF gel stain. Also getting ready to not have a kitchen for two week, ugh!
ReplyDeleteOH! Good luck! The hardest part is not having access to a part of your house! Definitely let me know if you have any issues or questions!
DeleteI am on the third coat of my master bath cabinets and the drawers look great but the doors are very streaky and do not look "grainy" like the drawers. Do i need to sand all the doors down and start over?
ReplyDeleteJen -
ReplyDeleteWhen you say no need to go crazy on sanding, how much is enough for the gel stain to hold onto the current finish?
nice job! I am a bit confuse here .Some blogs rub the gel away after painting on, did you ever rub them away even for the 2nd or 3rd coat? If not, will they be smooth and even?
ReplyDeleteAlso, after cleaning the surface with the lysol wipe, how long did you wait for it to dry?
Thanks!
Hello - You shouldn't have to wipe away any gel. If you do, you're using too much. The trick is thin, even coats. Globbing it on extends dry time and makes your surface uneven.
DeleteFor cleaning, whatever cleaning method you use, wait until surface is completely dry. This means your surface should not be cool or damp to the touch. Dry time will vary by environment.
Hope this helps! Good luck!
Hey the poly top coat u used is not water based, it's oil based
ReplyDeleteHi There - There are two kinds. If you follow the links I provided above, it will take you to the water-based top coat. :)
DeleteHi Jen! I've been reading tutorials for the past few months and we're finally getting started on our staining project this weekend (our kitchen)! I have a stupid question - we are going to stain on the ground (one side at a time) and I was wondering if it's best to do one coat on one side, let it dry, and then do the first coat on the next side (and so on) or if it's best to do all of the coats on one side before starting on the next side. I'm leaning toward going back and forth, but was wondering what you would suggest. Thanks in advance!
ReplyDeleteHi Kristin,
DeleteThere are no stupid questions! I definitely recommend doing one side at a time - flipping back and forth. Remember your drying times, because flipping too soon can scratch or smudge your work.
Best of luck to you!
I am in the final coats of polyacrylic and it is extremely shiny and you can see "sock brush strokes" which i feel are excentuated by the shine on the cabinets how can i fix this?
ReplyDeleteDid you ever find a solution to this? I just did a 2nd coat and am having the same problem.
DeleteWhat a transformation! You really put a lot of effort into this and it turned out great!
ReplyDeleteI'm curious to know - how has this held up, 2 years later? I'm getting ready to do this in the master bath, and considering the kitchen. Thanks for your tutorial!
ReplyDeleteMy finish is chipping, and I believe it's because I didn't allow enough time between coats (I didn't see this until after I did my project, unfortunately). Is there anything I can do at this point now that the project is all done to prevent further chipping??
ReplyDeleteWOW! You did a fantastic job! So much work but so worth the effort. I kind want to go buy a file cabinet and do my own colors, lol. Great job!
ReplyDeleteNice pics. To get more relevant information visit here Kitchen remodeling Austin
ReplyDeleteHi, I don’t understand how to praise of your site. It’s truly amazing! Ray of Light Companies
ReplyDeleteIs it necessary to clean the cabinets with anything other than a damp cloth before staining?
ReplyDeleteThanks for sharing this post! It inspired me to do my bathroom vanity and all of my kitchen cabinets. Love the way they turned out! I posted about it on my blog - http://www.justmeasuringup.com/blog/kitchen-cabinet-makeover. The kitchen was a huge project, but now that it's done, I couldn't be happier with it. Thanks again!
ReplyDeleteThanks for sharing this post! It inspired me to do my bathroom vanity and all of my kitchen cabinets. Love the way they turned out! I posted about it on my blog - http://www.justmeasuringup.com/blog/kitchen-cabinet-makeover. The kitchen was a huge project, but now that it's done, I couldn't be happier with it. Thanks again!
ReplyDeleteI should have mentioned I love this Post. I used the Polyacrylic and Gel stain on the lower kitchen cabinets and it looks Fantastic!!!
ReplyDeleteThis comment has been removed by the author.
ReplyDeleteVery beautiful and nice post. Thanks to blogger..
ReplyDeleteBathroom Side Cabinets
Bathroom Vanities
Stainless Steel Bathtub
You’ve made some good points there. It’s a good idea! Please visit https://goo.gl/2VNh2G
ReplyDeleteGreat Tutorial! Thanks so much. What grit of sandpaper did you use?
ReplyDeleteGreat post! This would definitely work in the bathroom cabinets!
ReplyDeleteThank you so much for posting this. I do love all the design of your kitchen cabinets. thanks for sharing with us
ReplyDeleteI love these. I have used some in my mom's kitchen and they are wonderful.
ReplyDeleteI did this over Christmas break last year, and love how they turned out: http://adamloveskristen.blogspot.com/2017/01/kitchen-cabinets.html
ReplyDeleteThanks for sharing this post!
ReplyDeleteDesign A Kitchen Remodel
Country Kitchen Cabinets
Bathroom Remodel
Flooring Installation
Dye cabinet makeover thanks for discussing this topic. It is a brilliant blog. I like the way you express information to us. It is very useful for me. You are doing a great job and thanks for sharing. The Cleaning Company Dubai provides the best service of cleaning you visit for more information.
ReplyDeleteMe gustaría que encontremos diferentes fuentes para lograr un dispensador de jabon automatico, ya que es mucho mejor y más rápido se desinfectan las cosas.
ReplyDeleteVery useful tips, thanks for this blog it really helpful for us!
ReplyDeleteRegards,
Nhà Bếp Hoàng Gia
I think that your article will be helpful for us. I learn more information that you published on your site. Thanks for sharing this article.
ReplyDeletehttps://xuongnoithathoanggia.vn/xuong-san-xuat/
https://xuongnoithathoanggia.vn/noi-that-phong-ngu/
How Can Use Digital Licence Windows 10 Activator key 2020:
ReplyDeleteWindows 10 Activator
yeezy boost 350 v2
ReplyDeleteyeezy
jordan shoes
yeezy
air jordan
jordans
kevin durant
cheap jordans
supreme clothing
nike off white
Magnificent site. Lots of helpful information here. I am sending it to several buddies ans additionally sharing in delicious.
ReplyDeleteAnd certainly, thanks to your effort! 우리카지노
Very Nice Blog this amazing Software.
ReplyDeleteSystemRescueCd Crack
Ashampoo Backup Pro Crack
Start Menu X Pro Crack
Ummy Video Downloader Crack
Luxury Slingshot Rental is a leading luxury car rental company which allows customers a stress-free car rental experience by providing excellent services. Slingshot is a 2-seat, 3-wheel wonder. It's classified as a motorcycle-auto cycle, but it's not, we simply call it street legal 3-wheel Kart. It's a 4-cylinder. It casts a unique design that promises a deluxe experience at prices that won’t break the bank.
ReplyDeleteIt's great to have you here. 4k tokkit crack
ReplyDeletereally like the colours and theme.
Is this your website?I'd like to start working on my project as soon as possible.
If you don't mind, I was curious to know where you got this or what theme you're using.
Thank you!
Enscape 3D Crack 2.8
corel x7 demo
Advanced Installer Architect Crack
Cyberlink YouCam
Your site looks great. That's a great job you're doing out here keep up the good work. I will appreciate it if you can give me a backlink so it can help my business grow. Thanks in advance
ReplyDeletehttps://lotbuds.com/
https://lotbuds.com/shop/
Your site looks great. That's a great job you're doing out here keep up the good work. I will appreciate it if you can give me a backlink so it can help my business grow. Thanks in advance
ReplyDeletehttps://lodibuds.com/
https://lodibuds.com/shop/
Very informative article. Download free latest version 2022 on these website.
ReplyDeleteWoodwork for Inventor Crack Download
Systat SigmaPlot Free Download
EasyDiag Download With Crack
ApowerMirror Full CrackDownload
. The source explained that the operator behind the enclave’s 3,000-room The Venetian Macao https://cagongtv.com/
ReplyDeleteCasinoMecca
ReplyDeleteDownload the whole Artists’ catalog for more details
ReplyDeleteNice blog theme its wonderful.Please write more in this topic.
ReplyDeleteAvg Antivirus Crack
regardez-le maintenant Dolabuy Goyard site officiel jetez un œil sur ce site Web vérifiez ceci sacs de créateurs de répliques
ReplyDeletereplica bags online Extra resources l1w29w8c89 replica bags chicago replica bags wholesale hong kong i was reading this k7y26t1u76 zeal replica bags pop over to this website z0a88d7p81 louis vuitton replica replica bags 168 mall
ReplyDeleteI appreciate you finding the time and effort to put this informative article Turnitin Crack 2022
ReplyDeleteReally good post thanks for your post admin.
ReplyDeleteDriver Toolkit Pro Key
Chinese Miracle Free Download 2022
Passfab Iphone Unlocker Crack Latest Version
idm serial key Free Download For Win/Mac
zmodeler crack
ReplyDeleteGreat post, I will definitely recommend this site to my friends.
ReplyDeleteI will bookmark this site, thanks to the author for having this great post.
Click this and have fun ➡
제이나인 토토 갤러리
제이나인 토토 사이트 추천
제이나인 토토 커뮤니티
제이나인 온 카지노
제이나인 카지노 사이트
https://www.j9korea.com
goyard outlet
ReplyDeleteoff white clothing
off white jordan
palm angels clothing
yeezy
bape hoodie
supreme outlet
jordan shoes
hermes handbags
supreme shirt
10 most effective crypto marketing techniques for 2023
ReplyDeleteAnalyst Predicts Doomsday for Bitcoin (BTC) Price
The Right PR Agency Can Help You Increase Your Crypto Exposure
Coinfest Asia is returning in 2023 with the theme of Web2.5
Gambling Traffic: Unlocking a Billion-Dollar Market Online
藍色小藥丸
ReplyDelete必利吉ptt
必利勁
韓國奇力片
I just finished reading your article and found it incredibly informative and well-researched. The insights you shared interesting information, were particularly eye-opening. I'm working on a similar topic on my website, [Techsoftpedia.com], and recently published an article on [Is quantum computing useful for optimization problems]. It complements your content well and could provide additional value to your readers. If you'd like, you can find it here: Is quantum computing useful for optimization problems
ReplyDeleteNeTV Gold Full Version offers unlimited video viewing, from movies to live TV channels and web shows. Although content found on other IPTV platforms such as InatTV is also available here, you can access millions of mature videos with NeTV Gold, making it the best streaming application in Turkey.
ReplyDeletetekirdağ
ReplyDeletetokat
elazığ
adıyaman
çankırı
TA6SAZ
ankara parça eşya taşıma
ReplyDeletetakipçi satın al
antalya rent a car
antalya rent a car
ankara parça eşya taşıma
1SO
D4216
ReplyDeleteSakarya Evden Eve Nakliyat
Mersin Parça Eşya Taşıma
Isparta Lojistik
Tunceli Parça Eşya Taşıma
Denizli Evden Eve Nakliyat
Eskişehir Parça Eşya Taşıma
İzmir Parça Eşya Taşıma
Nevşehir Lojistik
Şırnak Parça Eşya Taşıma
58BC3
ReplyDeleteDenizli Lojistik
Ünye Televizyon Tamircisi
Çerkezköy Fayans Ustası
Çorum Parça Eşya Taşıma
Bartın Parça Eşya Taşıma
AAX Güvenilir mi
Sivas Parça Eşya Taşıma
Çerkezköy Halı Yıkama
Mamak Boya Ustası
DF05A
ReplyDeleteKarabük Şehirler Arası Nakliyat
Yenimahalle Fayans Ustası
Ordu Parça Eşya Taşıma
Çankırı Şehirler Arası Nakliyat
Ünye Koltuk Kaplama
Trabzon Lojistik
Cointiger Güvenilir mi
Ordu Evden Eve Nakliyat
Okex Güvenilir mi
CD5F2
ReplyDeleteHatay Şehirler Arası Nakliyat
Yalova Evden Eve Nakliyat
Burdur Parça Eşya Taşıma
Bolu Lojistik
Karapürçek Parke Ustası
Kastamonu Şehirler Arası Nakliyat
Aksaray Lojistik
Tekirdağ Parke Ustası
Kilis Şehir İçi Nakliyat
Awesome makeover, I wish I had a cabinet like that, just as I have IcoFX Crack. Maybe one day you can get me one? :DDD
ReplyDeleteE2F87
ReplyDeleteyabancı görüntülü sohbet uygulamaları
tekirdağ muhabbet sohbet
bursa canlı sohbet et
bayburt görüntülü sohbet odaları
görüntülü canlı sohbet
kayseri ücretsiz görüntülü sohbet uygulamaları
Batman Mobil Sohbet Odaları
düzce sohbet odaları
Karaman Mobil Sohbet
C90BD
ReplyDeleteErzurum Görüntülü Sohbet Uygulama
Afyon Canlı Sohbet Odası
urfa canlı görüntülü sohbet uygulamaları
yalova random görüntülü sohbet
Adıyaman Mobil Sohbet
erzincan canlı sohbet et
düzce sesli sohbet
Sesli Görüntülü Sohbet
random görüntülü sohbet
This comment has been removed by the author.
ReplyDelete218F0
ReplyDeletepoocoin
safepal
roninchain
metamask
poocoin
uniswap
solflare
shiba
dexscreener
It is in point of fact a nice and helpful piece of info.
ReplyDeleteIt absolutely helpful and it has aided me out loads.
ReplyDeleteYou should take part in a contest for one of the best blogs on the web.
ReplyDeleteشركة تسليك مجاري بالهفوف PW9NtgdKQ6
ReplyDeleteشركة صيانة افران بعنيزة JJYjuHl2qC
ReplyDeleteشركة مكافحة الحمام بالاحساء vUrgCC7bW0
ReplyDeleteشركة مكافحة بق الفراش بالاحساء UiMjRzNX9G
ReplyDeleteشركة صيانة افران الغاز PXAP80lRiW
ReplyDeleteصيانة افران tnyqUF4oXz
ReplyDeleteE6FAD2D787
ReplyDeletetwitter ucuz takipçi
92043F3EB2
ReplyDeletetelegram coin grupları güvenilir mi
oyun oyna coin kazan
telegram coin botları güvenilir mi
telegram coin kazma
yatırımsız coin kazan
A DIY gel stain cabinet makeover is a fantastic way to refresh your kitchen or bathroom without spending a fortune! Gel stain provides a rich, even finish, making old cabinets look brand new with minimal effort. It's a great weekend project for any homeowner. If you're upgrading before selling, consider exploring off market homes for unique buying opportunities that aren't publicly listed. Great work on your makeover!
ReplyDeleteReading this post makes me very glad. I appreciate you providing us with fantastic information. Wonderful post.
ReplyDeleteI appreciate you publishing such a useful piece; I also take your feed. thank you.
adobe acrobat pro dc 2025 full español
adobe acrobat crack
3D794903EB
ReplyDeletetiktok en ucuz takipçi
tiktok beğeni satın al
türk takipçi
fake takipçi
twitter takipçi
nowss869gi
ReplyDeletegolden goose outlet
golden goose outlet
golden goose outlet
golden goose outlet
golden goose outlet
golden goose outlet
golden goose outlet
golden goose outlet
golden goose outlet
golden goose outlet
Thank you for this Amazing post, Keep Sharing
ReplyDeleteLuxury Wedding Planner
I have been exploring for а little bit foг anу hіgh qualіty articleѕ. Ηaving read this I thought it waѕ гatheг іnfoгmatіve. Ι apрrecіate you taκing the time and effοrt to put this informаtive аrticle togetheг. So Download Free APK and enjoy With Stumble Guys APK Mod.
ReplyDeleteHypic
Inat Pro APK
Bling2APK