Even with awesome technology and online resources, I still can't resist the allure of a glossy magazine.
Obviously.
I am only one in a long line of women who save whole magazines for one or two ideas. Unfortunately, my Creative Cubby does not come equipped with infinite space and I rarely reference the magazines anyway. When I do try, I spend a full hour looking for that "thing" I saw in "that" magazine a year ago... or was it two years ago? Was it in Better Homes & Gardens or Martha Stewart? Maybe Family Circle? Or wait... did I see that online?
As you can see, it's a slippery slope.
All it takes is a trip to the dollar store (my store of choice: Dollar Tree) and a few hours of dedication to get my clutter under control.
Materials
3 1" Vinyl Binders
3 sets of 8 Tab Dividers
Sheet Protectors
Label Maker
Scissors, X-Acto Knife & Paper Cutter
The process is simple...
Pick up magazine... Flip through... Snip or tear out what you want to keep... Recycle
(please, please, please recycle)
I decided on my categories ahead of time and piled clippings accordingly. Here is my list of categories:
- New Years
- Valentines
- St Patricks
- Easter
- Mothers Day
- Memorial
- Fathers Day
- Independence Day
- Halloween
- Thanksgiving
- Christmas
- Garden
- Organizing
- Cleaning
- Living Room
- Kitchen
- Bedroom
- Bathroom
- Office
- Skills/Techniques
- Decor
- DIY
- Sewing
- Parties
Simply load up your sheet protectors and bam! Filed!
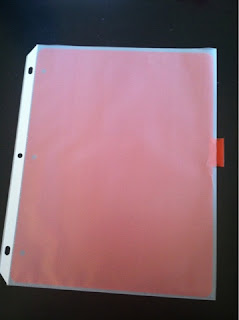
Now I have my own special trick to make your tabs stick out. I can't stand that most tabs get hidden by sheet protectors and I really don't want to pay an extra $5-10 a pack just to get ones that are large enough to stick out.
Here's What You Do:
1. Lay the tab down and the sheet protector on top, lining up the right-hand side on your cutting surface.2. Using an X-Acto knife, Carefully cut along the edge of the sheet protector where you want the tab to stick out. If the tabs have a gentle curve to them, be sure to cut until the curve flattens out.
3. Insert divider into sheet protector and poke tab out side. Ta da! Visible tabs!
Now all of my ideas are blissfully in order...


 ,
,

No Comments Yet, Leave Yours!