


When I first saw this project online, I knew I had to do it. However, I didn't want to use (and possibly burn up) my hairdryer or that much electricity for the artwork. Also... who wants to hold a hairdryer for that long? I decided to use the abundant natural resources I have and let the hot summer sun do the melting for me - bonus, I was able to just sit back and watch as the piece took shape.
{Extra bonus - this version is kid-friendly!}
Another great thing about planning the project during late summer (the hottest time of the year), most stores are stocking school supplies. I was able to buy my boxes of crayons for 30 cents each. Michaels also had a sale on canvases.
The total price of my project was less than $10 for all three pieces below. No hidden electricity costs!
Materials
Canvases (my large one is 24"x18", small ones are 10"x10")
Crayons (I used 4 boxes total)
Hot Glue Gun
Plastic Trash Bags
Lots of Sunshine
Intrustructions
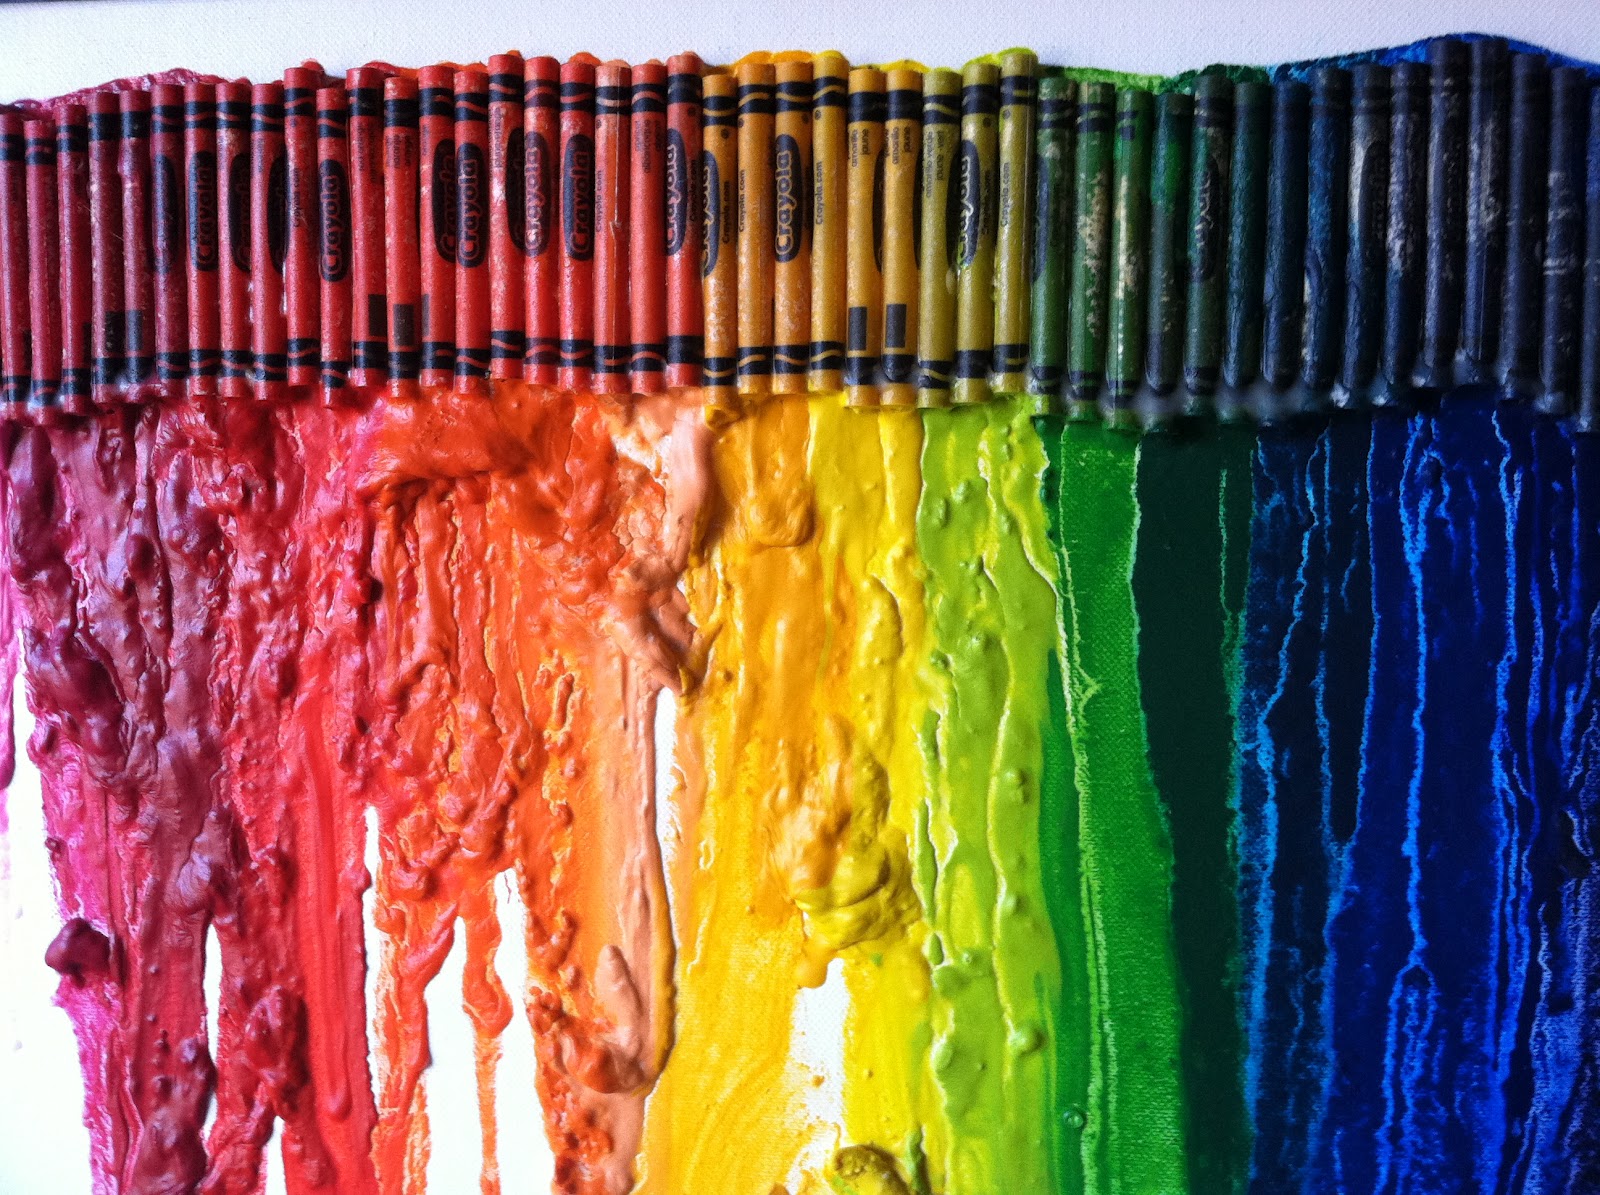
1. Determine the number of crayons you will need to complete your design and how you want them laid out. I've seen pictures with all bright tones or all dark tones. I opted for a rainbow pattern and eliminated the white, brown, black and gray crayons.
2. Once laid out, hot glue the crayons in place. You don't need a lot of glue on theses. I did two strips of glue about 2 inches apart and placed the crayons. Once the crayons melt, they will ensure long-term adhesion.

3. Set up your work space outside. If you have space along a wall (brick, stucco, wood), it's best to prop the piece up against it. The wall will radiate heat to the backside of the piece, speeding up the process. If you don't, don't worry! Your piece will still melt.
You do need to prop your piece up against something (a wall, chair, brick). If it is not propped, it will not streak downward. You'll just get a big puddle of color in the middle of the canvas (hey!-there's an idea!) Line the ground with your trash bags to catch any run-off of the crayon.

4. Sit and wait. The Arizona sun did quick work on my piece, but depending on your location, how much direct sun is hitting the piece, and your humidity level, it may take a little while.

5. When the canvas has melted to your liking, take inside for cooling. I laid my design on a clean trash bag on the kitchen table. It should only take about 10-15 minutes to fully cool.
6. Now it's time for hanging!

I call this
"Tantrum: A Childhood Meltdown"
Get creative with your designs. We created this piece for our library and wanted matching pieces for a smaller wall. We didn't want to exactly replicate the larger piece though, so I put the crayons on a slant. It proved to be a great way to incorporate additional pieces without being redundant.

Happy Melting!


 ,
,

love this idea jen!
ReplyDelete-jodi biasiucci
huundaap09j7
ReplyDeletegolden goose outlet
golden goose outlet
golden goose outlet
golden goose outlet
supreme outlet
golden goose outlet
golden goose outlet
golden goose outlet
golden goose outlet
golden goose outlet