Monday, May 28, 2012

Pirate Party: Treasure Map Cookies


If you have a pirate themed party coming up, these are a great treat for old and young alike!

Materials:
2 Bags - White Candy Melts
1 Bag - Black Candy Melts
1 Candy Decorating Bag
1 Package of Oreos
Wax paper
Large Mixing Bowl
Mixing/Measuring Bowl
Spatula or Spoon (for stirring)
Scissors
Cookie Sheets
Fork


Instructions:

1. Prep your materials.  Cover cookie sheets with wax paper.  Empty 2 bags of white candy melts into large mixing bowl.  Empty 1 bag of black candy melts into mixing/measuring bowl.  Open up package of oreos for easy access.  (I took the entire casing of oreos out of the package rather than having to wrestle with their new packaging.)  Also, you will want to clear out space in your fridge.  You will need enough space to cool at least two large cookie sheets.

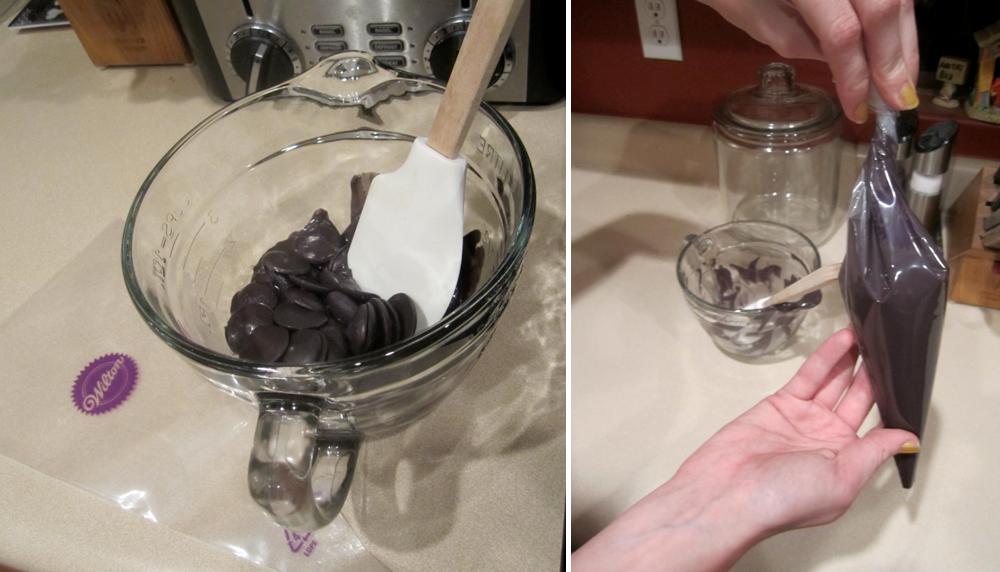
2.  Melt white candy melts in microwave according to instructions.  Be sure to follow instructions properly or you will overcook the candy melts.  Overcooking will make the candy taste bad as well as make it too thin to coat the cookie.
3. Working swiftly, drop an Oreo into white candy melts.  Using fork, gently push into the melt halfway or fully (just don't lose it) and flip it over.  Scoop up onto tip of fork - should be about halfway on the fork - and gently shake back and forth to encourage excess candy to fall off.  Scrap fork along side of bowl to remove any cluster of candy stuck to the back side.
4. Lay cookie out on wax paper.  The best technique that worked for me was placing the edge of the cookie that was hanging off the fork onto the wax paper first and then tipping the fork away from the bottom of the cookie.  There's no need to use your fingers with this technique and will allow your cookie to just plop down onto the wax paper evenly.

5.  Repeat steps until you have dipped the entire package of Oreos.  I ended up with two full cookie sheets of cookies
6.  Place cookie sheets in fridge to cool.  It took mine about 25 minutes to fully cool and harden but this will vary based on your refrigerator. To test readiness, simply gently tap the top of the cookie.  If you can see any sign of your finger print or it feels soft, they need to sit a little longer.  Pull them out when they are completely cooled.
**You will have a little ring of candy melts around the edge of the cookie.  I have yet to figure out how to do this without getting that ring without using a candy form.  If you have any tips for that, please let me know.  In the meantime, you will need to break the edges off the cookies.

7.  Wait 5-10 minutes for the cookies to come back up to room temperature.  This will make it easier to break the edges off.  Start with the slimmest part of the edge and just roll the cookie at an angle (see below).  Be patient.  This take a little while but it's totally worth it. 
**I placed all of my finished cookies on cookie cooling trays covered with wax paper.  This made it easier for me to decorate them.  However, this is not necessary.

8.  Melt 1 bag of black candy melts in your mixing/measuring bowl per the instructions, then pour into icing bag.  You may also choose to melt the candy melts in the bag without having to transfer.  This works well when you don't have someone nearby to help you hold the bag or you are less skilled at the one-person transfer.  Whichever method works for you.
9.  Twist top closed to ensure icing does not come out the tip.  I like securing it with a long chip bag clasp.  Once secure, turn upside down and snip off a small tip.

**Now, I was a little ambitious to use a separate set of candy melts.  If this frightens you or you don't have as much time or you want something a little easier, feel free to just use a tube of decorating icing.  It will certainly be easier to draw on the dashes.  However, please note that when using icing, you cannot stack the cookies - you will ruin your design.  With the candy melts, you can stack them.

10.  Set to work.  I did a free-form set of dashes and X's.  Have fun with it!
11.  Once you finish your dashes, return the cookies to the fridge to cool for another 15 minutes.  I recommend leaving them in the fridge until no more than 45 minutes before serving.  And don't worry.  Your beautiful cookies won't melt if they sit out for a few hours.  That is... unless you place them outside in the Arizona summer... yikes!

Enjoy!!!

Kids' Pirate Party


 I was recently enlisted to assist our good friends in decorating for their 2 year old sons' birthday party.  Obviously, shopping for pirate party supplies was loads of fun, but I found that creating my own was a lot more fun.  With some help from great internet printables (see "Inspiration" below), we were able to create an over the top pirate party to welcome the terrific twins to the terrible twos (say that 5 times fast).

To guide guests to the best treasure EVER, we turned the front walkway into a real life treasure map.  "X" always marks the spot.

Inside guests were greeted with a plethora of pirate booty.  Complete with pirate accessories, booty bags (filled with Hersey's Gold Nuggets), pirate map cookies, and pirate tootsie pops.

Outside became a kid's watery playground, but we had to make sure it was pirate friendly.  Pirate bunting was hung from the pergola and a net catching some seafaring friends hung along the back wall.

Finally, to be sure the watery playground had a good background, we hung this last bit of pirate bunting on their wall.

**Tip: We made all buntings using a paper cutter, x-acto knife (for the tough points) and twine.  Some people like to use ribbon, but we thought the twine had a more "piratey" look to it.  You can get bundle of twine at Home Depot or Lowes for about $4. 

Hope this inspires you!!!

Inspiration:
"Ahoy" Banner: http://bnute.blogspot.com/2011/05/free-printable-lilpirates-ahoy-banner.html
Pirate Skull Cap Suckers: http://blog.thecelebrationshoppe.com/2012/02/21/diy-pirate-skull-cap-suckers/
Triangle Pirate Bunting: http://www.cottage-industrialist.com/blog/2010/5/2/aaargh-pirate-birthday-party-free-printables.html
"Arrr" Bunting:  http://blog.thecelebrationshoppe.com/2012/02/21/diy-pirate-skull-cap-suckers/

Friday, May 25, 2012

Pinspiration Friday


someecards.com - There should be a DID THIS button on Pinterest ... complete with loud applause when you click it.


Happy Pinspiration Friday!

I hope everyone has a fun and safe Memorial Day weekend!
 
Blogging tips