Wishing you a safe and joyous new year!
Wednesday, December 30, 2015
Happy New Year!
Labels:
Holiday,
Jens Jabbers
Thursday, December 24, 2015
Happy Holidays!
Labels:
Christmas,
Holiday,
Jens Jabbers
Monday, December 21, 2015
Welcome, Winter!
Labels:
Jens Jabbers
Tuesday, December 15, 2015
Wrapping Presents with Ornaments
Every year, I tend to get a little too fancy with the wrapping. We're talking thick paper, ribbons, and always some type of embellishment. This year, everyone is getting gifts with ornaments on top. I mean, really, it's super pretty and what's life without a little whimsy?
As a bonus, adding ornaments to gifts is an inexpensive and incredibly easy way to dress up the packaging.
I got my ornaments and ribbon at Big Lots - on sale. I love the glitter snowflakes! I've used them in wrapping and decorating for years. The miniatures bulbs were the perfect touch to the top of the gift.

So how do you do it? Simply string the ornaments on twine or ribbon and attached to your package. No fancy techniques. Not tricks. String and tie... and it looks like you spent a bundle on fancy wrapping. Everyone gets free ornaments too!
I also like buying ornaments for people as gifts. This is the perfect opportunity to showcase them! Who says you have to put all gifts inside a box?
Like the gift tags? Get the free printables here!
Happy Wrapping!
Saturday, December 12, 2015
Free Printable Polka Dot Christmas Gift Tags
Tis the season for gift wrapping! I love wrapping gifts. I get creative with decorating the packages and creating fun labels. This year, I decided to do a few printables and share them with you!
It's as easy as print, clip and attach!
These labels look best when printed on card stock, but of course, use whatever paper you fancy. They also look great layered on a piece of colored cardstock (use double-side tape or glue stick to adhere).
Using a hole punch and some twine or ribbon, you can create hanging tags... or use them flat.
Aren't they cute?!
Happy Wrapping!
Labels:
Christmas,
Holiday,
Printables
Thursday, December 10, 2015
Put Together the Perfect Guest Basket
Every year, millions of people travel to the homes of family and friends for the holidays. While guests are just happy to be in the comforting presence of those close to them, there's always a little more you can do to make your guests feel at home.
Put together a small guest basket of items your guest may need whether because they forget it or feel a little awkward asking for it, especially if it's needed in the middle of the night, like water or a snack. It's as easy as raiding the samples aisle of your local drug store or Target. For a mere $10-15 you can make your guests feel right at home.
Here's what to include:
1. Magazines or Reading Material
2. A Box of Kleenex
3. Bottle of Water and a Snack
4. Chapstick ... because who knows when you'll lose yours
5. Various Toiletries ... shampoo, toothpaste, deodorant, etc
6. WiFi Password
7. Remote
8. Black Wash Cloth ... Why? If your guest is female, she will appreciate not ruining white or lightly colored face towels when taking off her makeup.
What other items would you include?
Labels:
Holiday,
Organizing,
Tip Tuesday,
Tricks and Tips
Monday, December 7, 2015
Felt Christmas Lightbulb Garland
Christmas lights have always been my favorite part of the holiday season. All of the colors lighting up the night to welcome in the season. My deep love of Christmas lights comes from something my dad used to do for me when I was a kid.
My childhood bedroom faced the front of the house, which meant I got a front row seat to all of the holiday decorations my parents set up in the front yard. My favorite decorations were the large, blinking lights hung from the eaves of the house. When time came to be tucked into bed, my dad always turned the blinds to face downward so I could fall asleep watching the lights blink. The colorful light would flood my dark room as I tried to predict which light was going to blink next. It was magical.
I've been wanting to do a felt garland of Christmas lightbulbs for a while now, but it has taken time to find style and technique. I didn't want to just cut ovals out of the felt and say, "Look! Lightbulbs!" Thankfully, I finally found the right lightbulb image from MakeLearningFun.com and the rest fell into place.
I think my favorite part of this project is the lightbulbs look like something straight out of A Charlie Brown Christmas.
The best part? This project is sooooooo inexpensive for quite a bit of material. Just wait and see...
Fabric Scissors
Paper Scissors
Sharp Yarn Needle
1. Print out lightbulb images from MakeLearningFun.com. I printed the page of lightbulbs as a 4" x 6" photo so the lightbulbs would be smaller than the regular printable. This can be easily achieved in your print settings.
Cut out TWO lightbulbs. You will need one full lightbulb an on the second, cut off the top {the socket}.
2. Using fabric scissors, cut a strips of color felt the length of your lightbulb. Then cut rectangles to fit the width of the lightbulb.
3. Now cut around the lightbulb. Remember, this is felt. It doesn't have to be perfect.
4. Time to do the socket! Same deal - cut a strip of grey felt the width of your socket piece then cut into rectangles. Cut out your final socket shape. These can be tricky because they are small so watch your fingers!
6. Let's put this garland together! Thread your yarn needle with your yarn. I don't precut my yarn for my garlands, just in case I want more length, but it's up to you. Again, mine ended up at 6 feet long.
Stack your grey socket on top of your color lightbulb. Slightly to the right, poke your yarn needle through the backside and pull through...
.... then slightly to the left, poke your needle through the front of your lightbulb...
... pull through and you've strung your lightbulb!!!
7. Repeat until you've strung all the lightbulbs to your heart's desire. Your lightbulbs will be able to slide easily along the yarn. If you'd like to prevent them from sliding, I recommend adding a small dab of glue on the back side over yarn.
9. Hang and enjoy!
Happy Holidays!
Friday, December 4, 2015
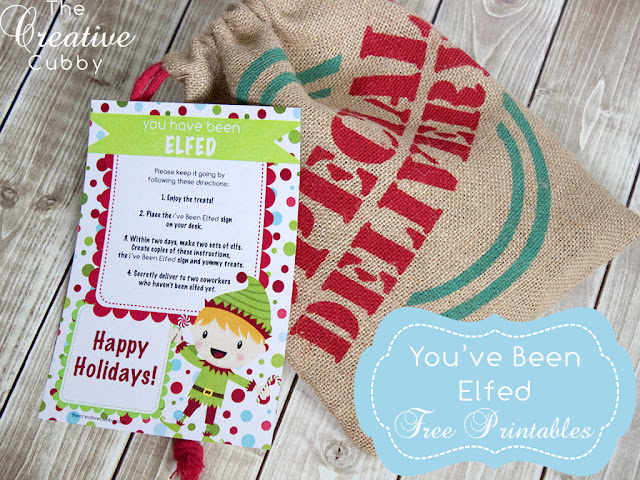
You've Been Elfed
It's that time of year again to surprise your neighbors and coworkers with a surprise gift! Over the past few years, Elfing has become a holiday tradition in the US. With good reason too! Dropping off an anonymous gift to a neighbor or coworker is sneaky, fun and purely good natured.
This year, I've redesigned the You've Been Elfed tags for neighbors and work. You now have your choice between a boy or a girl elf on the printable. As always, the printables are free!
*Graphics by Pixel Paper Prints.
Labels:
Christmas,
Holiday,
Printables


 ,
,
