Sometimes a girl just needs a preppy tote.
A tie tote is not only a cool project with ties,
it's a great way to show your school pride!
I found ties that correspond with my beloved
Arizona State University!
Maroon and Gold!
Again I found ties at Goodwill
and for this project you'll use the entire tie.
No waste!
Materials
Canvas Tote
Ties (I used 8)
Scissors
Seam Ripper
Sewing Machine
Needle
Embroidery Floss in complementary color
Measuring Tape
Instructions
1. I used a simple white tote I had lying around my craft room. These are typically sold in packs of three at craft stores. Measure your tote's width and length.
2. Measure and cut your ties. You will need the wide end of the tie and the skinny tail for this project.
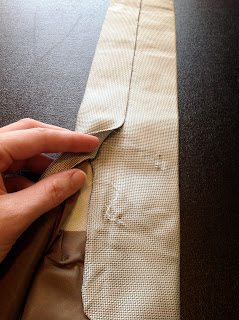
3. Deconstruct all your ties. For detailed instructions on deconstructing, please see the Tie Pillow Tutorial.
4. Figure out your pattern. I focused on every other piece being skinny and wide, as well as the maroon and gold being evenly spaced.
5. Pin your tie flaps together in such a manner that your pressed seams (from the original tie structure) will be sewn together.
6. Sew together along all the seams. Be patient with this. It took me forever because I am not a very skilled sewer - but practice makes perfect! When you're done, you will have a tie fabric!
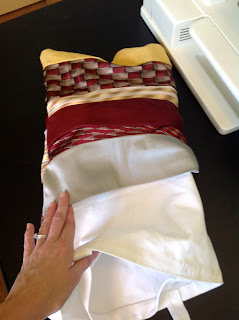
7. Lay out your fabric face up and fold in half length wise. We are going to sew two seams along the outside to create a pouch. Pin your fabric together. Be sure to measure multiple times. You will want to be sure that your tote will fit in your little pouch. {The picture below makes it look crooked... I swear it wasn't - bad photographer moment}
8. Sew up your sides with two straight seams. As always, please remember to reverse stitch your seams. This will lock your thread into place.
9. Turn your fabric right side out and stuff your tote inside.
10. Fold your excess material so it is even with the top of the tote. Pin into place.
11. Use a blanket stitch to finish off the top. If you've never used a blanket stitch, have no fear! It is super easy and looks lovely when done.
Go all the way around the top edge of your tote and you're done!
I would recommend adding some extra embellishments if you'd like!
Check back tomorrow for our last Preppy Project!


No comments:
Post a Comment