Monday, April 22, 2013

Happy Earth Day!


We live in an absolutely beautiful world.  As a crafter, I'm an advocate of limiting waste and maximizing resources to reduce my negative impact on the world while filling it with more beautiful things.  In honor of Earth Day, I'm posting links to projects I've done over the past year that I feel contribute to a lifestyle Mother Nature would be proud of.

Think Green and Be Fabulous, my friends!


Celery Snack Packs
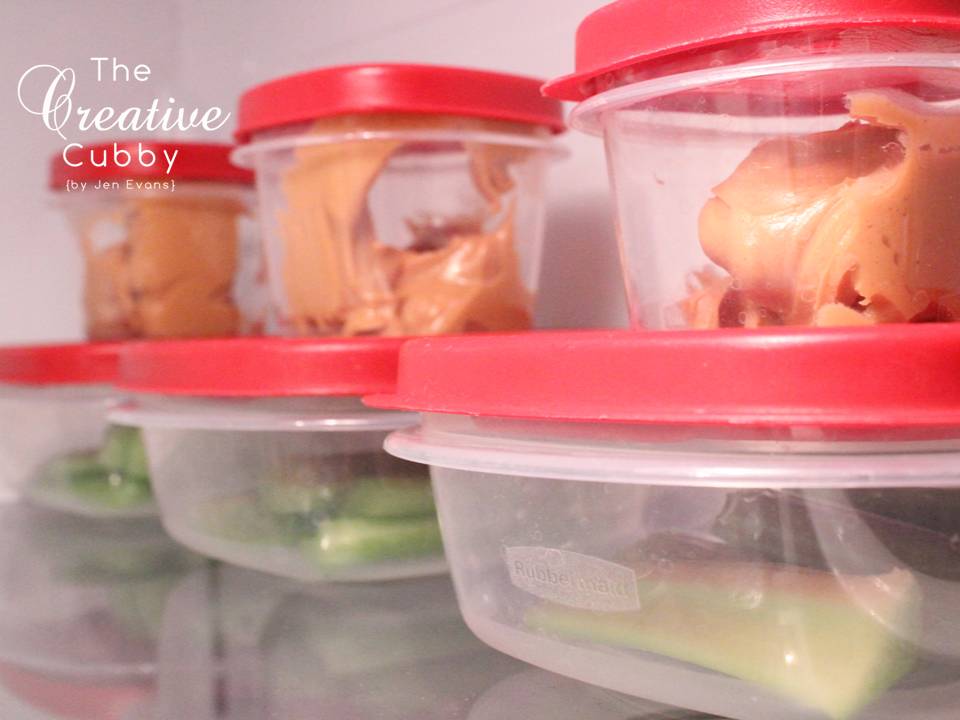
Why buy those expensive and wasteful snack packs at the grocery store?
Take 5 minutes to make your own.

Crocheted Napkin Rings
This is a great use for excess yarn.  If you don't have enough to complete another project, try this one!  It's colorful and a great conversation piece.

Picture Frame To-Do List
Do you have a picture frame just sitting around your house?
Put it to work as a dry-erase to-do list.

Felt Leaf Garland
I don't know about you, but I accumulate a ton of felt scraps.
Keep them throughout the year and make a vibrant felt leaf garland.

Tied Ribbon Garland
On the same note as felt, I always have a ton of fabric scraps.
If you aren't a quilter, theses scraps can be put to work as a tied ribbon garland.
Great project for little hands too!

Soup Can Bats
Fall = Soup = Soup Can = Awesome Bat

Tie Projects
Ties get old, stained and go out of style.
Check out a handful of projects to repurpose and upcycle them!

Ultimate Drain Cleaner
I'm a fan of minimizing chemicals when cleaning.
This natural drain cleaner will blow your mind.

Wine Rack Yarn Holder
Sometimes you have spare items lying around your house...
like a wine bottle holder.

Idea Binders
Do you have hoards of magazines sitting around your house that should be recycled?
Create idea binders to hold the articles you want to keep - recycle the rest!

Pringles Cans + Scrapbook Paper = Cute Storage.

Wednesday, April 17, 2013

How to Make Picture Charms


Every time I have cruised Etsy, I came across gorgeous picture charms for necklaces.  They are so organic, stylish and personal.  For a fee, you can send your personal photos to an artisan, they'll print it to create your charm and viola!  You have a personal gift.

But I ask you... why pay others to do for you what you can do for yourself?

These charms are fabulously easy and inexpensive to make - you just have to have the right materials and a small dose of patience.  Even better, they make amazing personalized gifts!

Materials
Glaze {Used: Sun and Moon Craft Kits; $1.50-22.00 - a small bottle goes a looong way!}
Pendant Tray and Glass {Used: Sun and Moon Craft Kits; $0.55 and $0.25}
Necklace Chain {Used: Sun and Moon Craft Kits; $0.60}
Scissors
Nail File
Photo or Magazine*

*You can use a number of photo material for these charms - however, be sure to use THICK materials.  Meaning, do not use magazine pages - they are much too thin and will wrinkle while drying.  Magazine covers work really well, as do calendars and photo paper.

Instructions
1.  I decided to use this vibrant cover of Martha Stewart Living Magazine.  Take time to evaluate your piece and find your perfect position.
 A good way to approach this is to take your glass cover and use it as your "lense".  Move it around until you have your perfect location.
 Use a pen to either outline all the way around your glass or, as I did, create little brackets to be your guide.  Do not rely on your memory to ensure you get exactly what you wanted.  Better safe than sorry.
 Happy?  Time to move on.

2.  Apply a THIN layer of glaze to your glass and place.
 You will have a little overflow - that's okay.  Just make sure you don't have any air bubbles trapped under you glass.

Take a few moment to ensure the glass stays in place - do not move your materials for at least the next hour!  It may cause the glass to shift or invite air bubbles into the glaze.

3.  Allow to dry 12-24 hours.  Overnight is best to ensure your glaze and paper are thoroughly dry.

4.  Cut glass piece out of paper - as close to glass as possible.

 5.  Chances are you have some overhang of paper and leftover glue.  Use your nail file to file away paper and glue.  Test the glass piece's fit by laying it in your pendant tray.  Not sliding all the way in?  Keep filing.  Once all of your edges are smooth and of the proper size, the glass piece will slide right into your pendant tray.

 6.  Ready to go?  Apply a light layer of glue to your pendant tray.  You don't need to fill the entire tray, just enough so it will spread once you place the glass piece.

Allow to dry 1 hour before wearing.


Gorgeous, right?  For the cost of a small bottle of glaze, the pendant tray and the necklace ($3.00 + shipping), you can create beautiful personalized gifts.

I am in love with Sun and Moon Craft Kits - not only are their products of a great quality, they are super fast in shipping!  They have a huge variety of styles and materials too.  Check them out!


** This post is not sponsored by nor affiliated with Sun and Moon Craft Kits.  The reviews and recommendations herein are solely of the author's own fair opinion.

Wednesday, April 10, 2013

{In The Shop} - Halloween Witch Cross Stitch Pattern


One of my favorite crafty projects is cross stitching.  For me, it feels like putting together a puzzle - I can focus on little areas at a time and suddenly a picture has appeared!  Though tedious, learning and mastering cross stitch has taught me patience and acceptance of flaws.  You see, I'm an insufferable perfectionist - but with cross stitch, most errors cannot be seen nor detected.  My cross stitches are riddled with errors, but can you tell?  Check out my Cross Stitch Gallery to see the projects I have completed and am most proud of!

Last fall, I decided I wanted to try making my own cross stitch pattern.  I wanted to create a great beginner's pattern that required minimal materials.  I did a lot of brainstorming and debating and have come up with a few to finally debut!  Meet the first pattern!

Cross Stitch evokes a vintage, old-world aesthetic and what time of year is this most appreciated?  Well, Halloween, of course!

This Halloween Witch Cross Stitch Pattern was inspired by two greats, Shakespeare and Harry Potter.  Does the witch look familiar?  If so, then you're a huge Potter-head!  She was inspired by The Leaky Cauldron sign.

Again, this is a great beginner's pattern.  All you need is an 8"x10" piece of "Sandy" aida {the fabric}, DMC 3371 {the thread}, a needle and some scissors.  Ready to give it shot?
$4.00


Friday, April 5, 2013

Are Your Facebook Posts Public?


Okay, typically I don't touch on Public Service Announcements, but I am increasingly seeing an issue that needs to be addressed.

Your Facebook posts, particularly those done through mobile devices, may be public.

Whaaaat?  I know, it's irritating.  This has nothing to do with Facebook's changing security issues - I have found a correlation between mobile app updates and my mobile sharing privacy settings being reset.

Here's what you need to know.

See that little globe next to my post info? 
That means it's public for aaaaall to see.

You need to make sure to take two steps.
**This must be done on a computer!**
You cannot make these changes on your mobile device.

First, change the status of the post.
Simply click on the icon.  A drop-down menu will appear.
Select your option and you're done.
 See, just friends now!

You must do this individually for ALL posts that are public.
There is not a setting to reset all previous/past posts.

To make sure this doesn't happen again,
in the upper left-hand corner, there is a lock next to your name.
Click.
Then select "Privacy Shortcut". 
Change the option under "Who can see my future posts?"

The ONLY post on Facebook you cannot control the privacy settings on is your Cover Photo.  Those are all public.  Nothin' you can do about it.

Want to make sure your settings are set to your liking?
EASY!  

On your profile page, locate the Activity Log button on the right-hand side of your page.
Click on the gear next to it.
Select "View As".
You will immediately see your page change to a "non-friend" or "Public" view.
See something there you don't want other people to see?
Simply click on the symbol and change the settings.

This knowledge puts you back in the driver's seat of your Facebook profile.
Pay attention to that one little symbol and you are set!
Enjoy!


Tuesday, April 2, 2013

No-Sew Fleece Blanket Tutorial


It's springtime in Arizona, which means warm weather, barbecues and of course, baseball - lots and lots of baseball.  Spring Training comes to Arizona and suddenly we're all "batting averages" obsessed.  Whether is is MLB or Little League, we start to spend all of our time outside on the grass or in the stands.  Why not make yourself comfortable out on the field with this easy and quick no-sew fleece blanket?  Costing less than $20 and taking about an hour, this is project perfect for parents and kids alike.  Best of all, it can be personalized to your favorite slugger's team colors.  :)

Materials
Fleece {Used: 2 yards of each, solid color and pattern}
Fabric Scissors
Measuring Tape
Sewing Pins

Instructions
1.  Prep fabric by trimming off any logo edging.  Don't worry - this usually will not affect the size of your fleece.

 2.  If necessary, cut fleece to size.  I had purchased a longer piece of fabric so I can make a No-Sew Fleece Pillow later, so I had to trim my down to size.  My final size was 5 feet by 6 feet.
The fastest way to cut your blanket to size is to cut one piece of fleece first.  Once it's the perfect size, layer it on top of your other piece and trim around.

Layer your fleece as desired.

**Remember, these blankets are very forgiving so do not stress over perfectly straight lines or measurements.

3.    Now, it's time to do your corners.  Working from your first corner, measure in 5 inches from each edge.  Use pins to mark.  I used 2 pins per side of my little square to make sure it stays.  Repeat this for all four corners.  Finally, cut your corners out.  Remember to cut on the edge side of your pins - not the inside!  What you are left with looks like a giant + or what resembles an old fashioned pharmacy symbol.

 4.   Pin across fabric from corner to corner to create new edge.  Your pins should be approximately 5 inches from the edge of the fabric.  You will need a lot of pins for this.  Pin all four sides.  Remove the pins from step 3.  At this point, you should not have pins on the outer flaps of your + shape.

 5.  Cut your fringe.  Lay your measuring tap along the edge of your fabric.  Cut every 1 inch wide.  Complete your cut all the way to your pins.  Therefore, your fringe should be 1 inch wide x 5 inches long.  Please do not stress over making them exactly this measurement.  You will just want to be in the ballpark.  Cut all four sides.

 6.  Tie your fringe together.  Simply take the bottom piece of the fringe and the top and tie using a simple knot.  Double knot each piece of fringe. 

**If your blanket is starting to bunch together, like below...
...gently tug on both sides of the bunched up section and allow the fleece to stretch.
 Work around all four edges, removing pins as you go... and soon...
 you will have a beautiful No-Sew Fleece Blanket.

Enjoy the blanket and enjoy the game!
 
Blogging tips